Friday, 21 February 2014

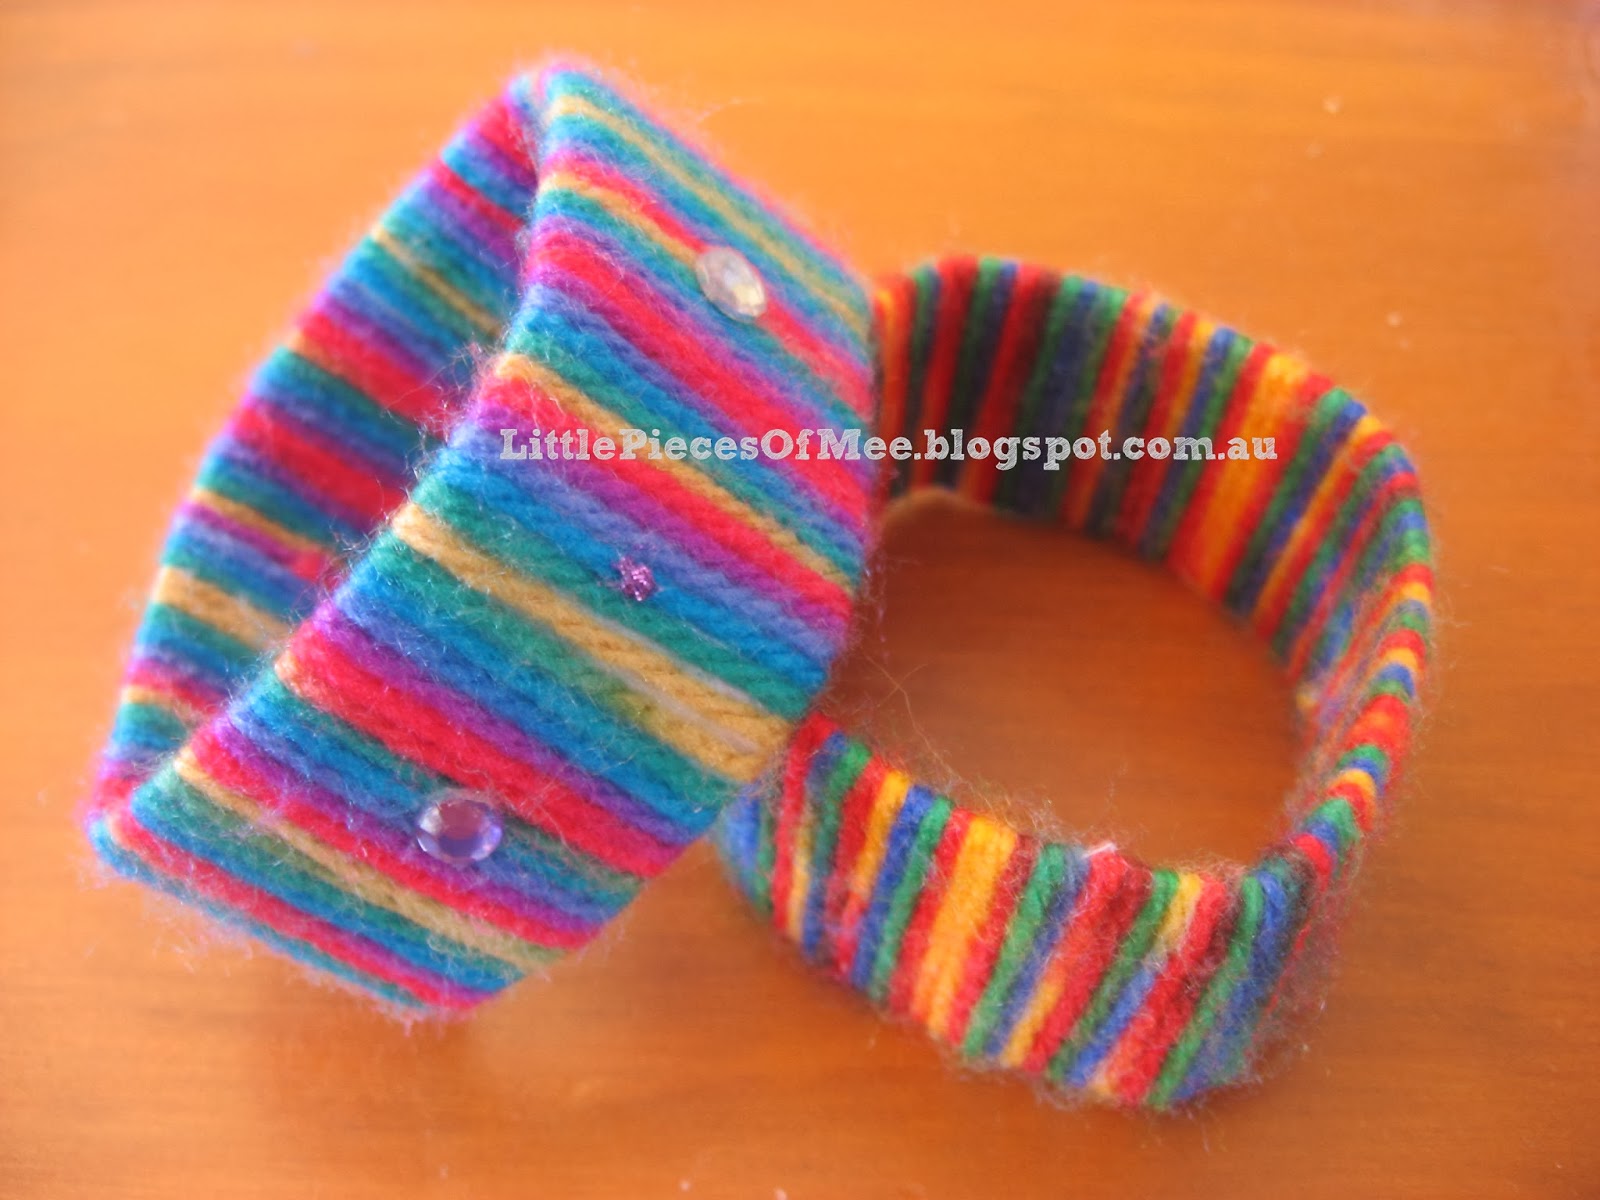
Craft kids woollen bangles

On the weekend my nearly-6-year old wanted to do something crafty so after much googling we came across a photo of a kit to make bangles wrapped with wool.

 
We didn't have any bangles that we could use, so we improvised. I hunted through our recycling pile and found some empty, clean kids yogurt tubs and worked out that if I cut the top and bottom off they would be perfect for the job.


I gathered my supplies: a ball of wool (I used a ball of multi-coloured wool, but you could use a solid colour or a few different colours), some scissors, sticky tape and the cut-down yogurt tub. 


I started by sticky taping the end of the wool to the inside of the bangle, and then my little munchkin wrapped the wool around the bangle. I held the wool that she had wrapped so that it stayed taut and we kept going (and going) until we got all the way back to the start. 


If you run out of wool part way, or want to change colours, to attach a new piece just tie the two pieces together so that the knot sits at the back of the bangle and then keep wrapping. As you wrap the wool, tuck the tails under the wool so that you can't see them.


When you get back to the start, tie the end of the wool into the first string and tuck the ends in under the wool so they don't stick out.


If you want, you can decorate the bangle with glitter glue, gems, etc. Or just leave it as is.


Saturday, 15 February 2014

Travelling hearts card

A few days before Valentine's Day I saw a gorgeous heart map wall art on the web and thought that it would make a perfect idea for a Valentine's Day card for my hubby. This is how it turned out:
 

I started by finding maps on Google Images of different places that are special to both of us - places we have travelled to together over the last 15 years, and the place we call home. In Word I set up a blank page with 9 identical hearts (no fill, just a black outline), spaced roughly the way I would put them on the finished card (see tip below), and then one by one I copied each map image into the Word document and resized it until it fit perfectly inside one of the heart outlines. I made sure for each map that you could read the name of the place  I then printed the page of maps on white cardstock and cut out each heart shape. I cut inside the line of the heart so that you couldn't see it on the cut out hearts. I then folded each heart in half (so the fold line goes from top to bottom) and glued the fold line of each heart onto my card. Having the fold in the hearts allows them to sit up for a 3D effect.


I was so happy with the end result, and I think my hubby was impressed too - even more so when he realised the significance of each of the maps.

This would also make a great birthday card for someone who loves to travel or is about to set off on a trip.

Here's a tip for working with Word when making cards: using the Print Layout view (ie where you can see a white area representing the printed page, with a grey border around the outside), hold a sheet of paper up to your screen and adjust the zoom until the size of the document on the screen matches exactly to your piece of paper (on my computer it's 107%). Then you know that whatever is on the screen will print at pretty much that size - this is great for lining up text and/or images to a particular spot on your paper, or getting something the right size to fit a particular card size.


Thursday, 13 February 2014

Raw lime slice

It was a pretty hot day here and it was my turn to host our weekly mothers' group gathering. I wanted to make something healthy and summery without needing to spend time in the kitchen next to a hot oven. I remembered seeing a recipe in the Woolies magazine a few months ago for a raw lime pie, so I found the recipe and decided to make it in a slice pan instead of a round springform pan. This way I could cut it into smaller pieces so the kids could sample it if they wanted to, and us mums could have one piece or three, without feeling guilty.

The end result was pretty good, maybe a bit too strong on the lime flavour (but my limes were on the larger side). I think next time I will cut back a bit on the lime juice and maybe add a bit of extra honey to balance the flavours a bit more.

Just a warning though - this is best served within half an hour of removing it from the freezer otherwise it will melt and is very difficult to eat without a spoon.

I have the leftovers stored in the freezer for some guilt-free snacks/desserts. This is free from dairy, gluten, egg, and refined sugar, and very easy to put together. You just need about 15 mins prep time and a couple of hours to freeze before serving.


Sugar free raw lime pie

Preparation time: 15mins
Cooking time: nil

1 cup walnuts
1/2 cup fresh pitted dates
1/2 cup of cocoa
2 avocados
3 limes
Zest of 1 lime
1/4 cup manuka honey
1/4 cup of organic coconut oil

Line base of a round 20cm springform tin (or an 18cm x 28 cm slice pan) with baking paper. Process 1 cup walnuts, 1/2 cup fresh pitted dates and 1/2 cup of cocoa in a food processor until crushed.

Press mixture firmly into base of the tin and freeze. Meanwhile, process flesh of 2 avocados, juice of 3 limes, zest of 1 lime, 1/4 cup manuka honey and 1/4 cup of organic coconut oil in food processor until smooth. Pour over base and freeze until set.

Remove 30 minutes before serving. Cut into wedges and top with frozen berries to serve.