Sunday 21 April 2013

"Mummy, can we do something crafty?"

My eldest daughter loves doing crafty things, just like me. She loves doing Google Image searches with me to find new ideas of great kids craft things, so I thought I'd share some of our recent creations. Many of these are almost exact copies of the original work as my daughter also loves doing things exactly the same as the original, even though I try to encourage her to put her own touch on things. I've included links to the original works where ever I could still find them.

Easter bunnies
 
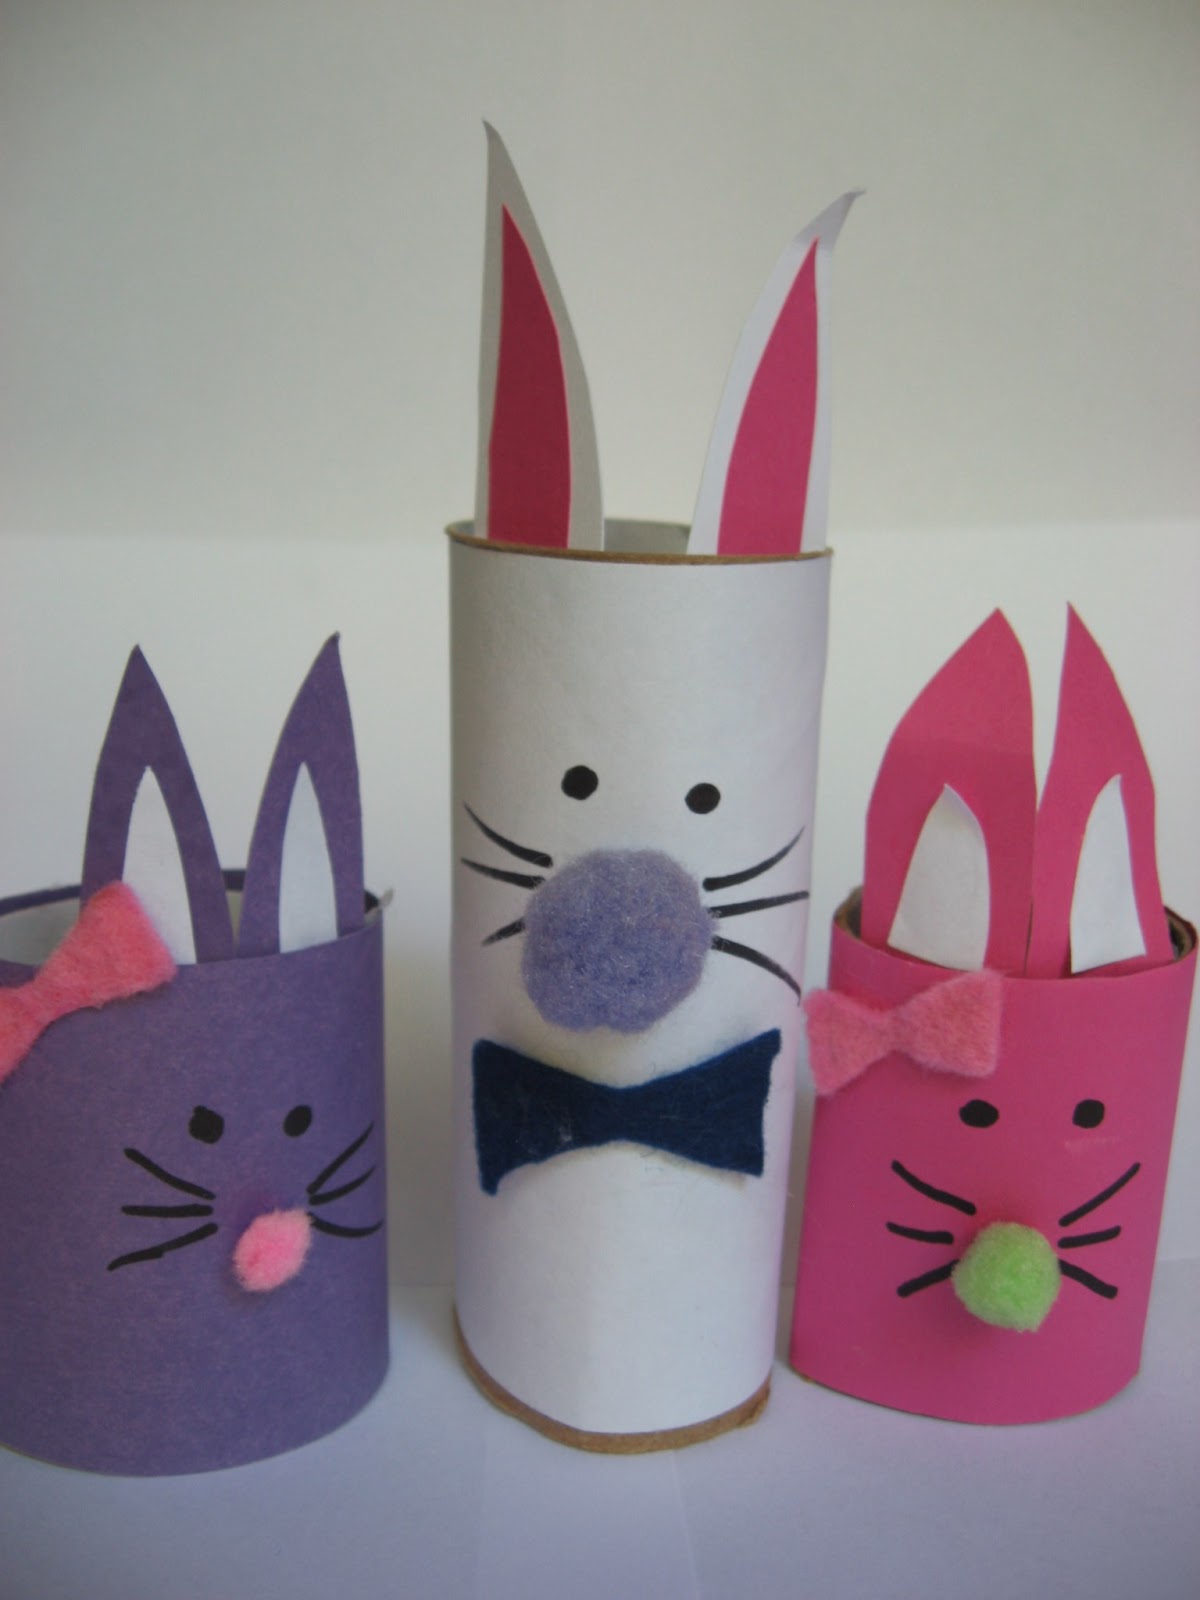
One of my girls' favourite craft materials is toilet paper rolls. Until about 2 years ago, I had no idea how versatile these humble little cardboard tubes could be in the hands of a creative little girl (and her mum). We have downloaded and constructed many of the toilet roll creature templates from DLTK's Crafts for Kids, but we also have done some freehand versions too. Just before Easter we made a family of bunnies (there were 7 in total with a mummy bunny, a daddy bunny and 5 little bunny kids). Some of them have hopped away before I could get a photo of them, but here are three that I could find this morning:


The original bunny family was created by Crafts by Amanda. We used paper instead of paint as its much quicker for impatient kids to work with, and not so messy. We decorated them with felt for the bows, pompoms for the noses, a black marker for the eyes and whiskers and just cut the ears freehand.

Mermaids

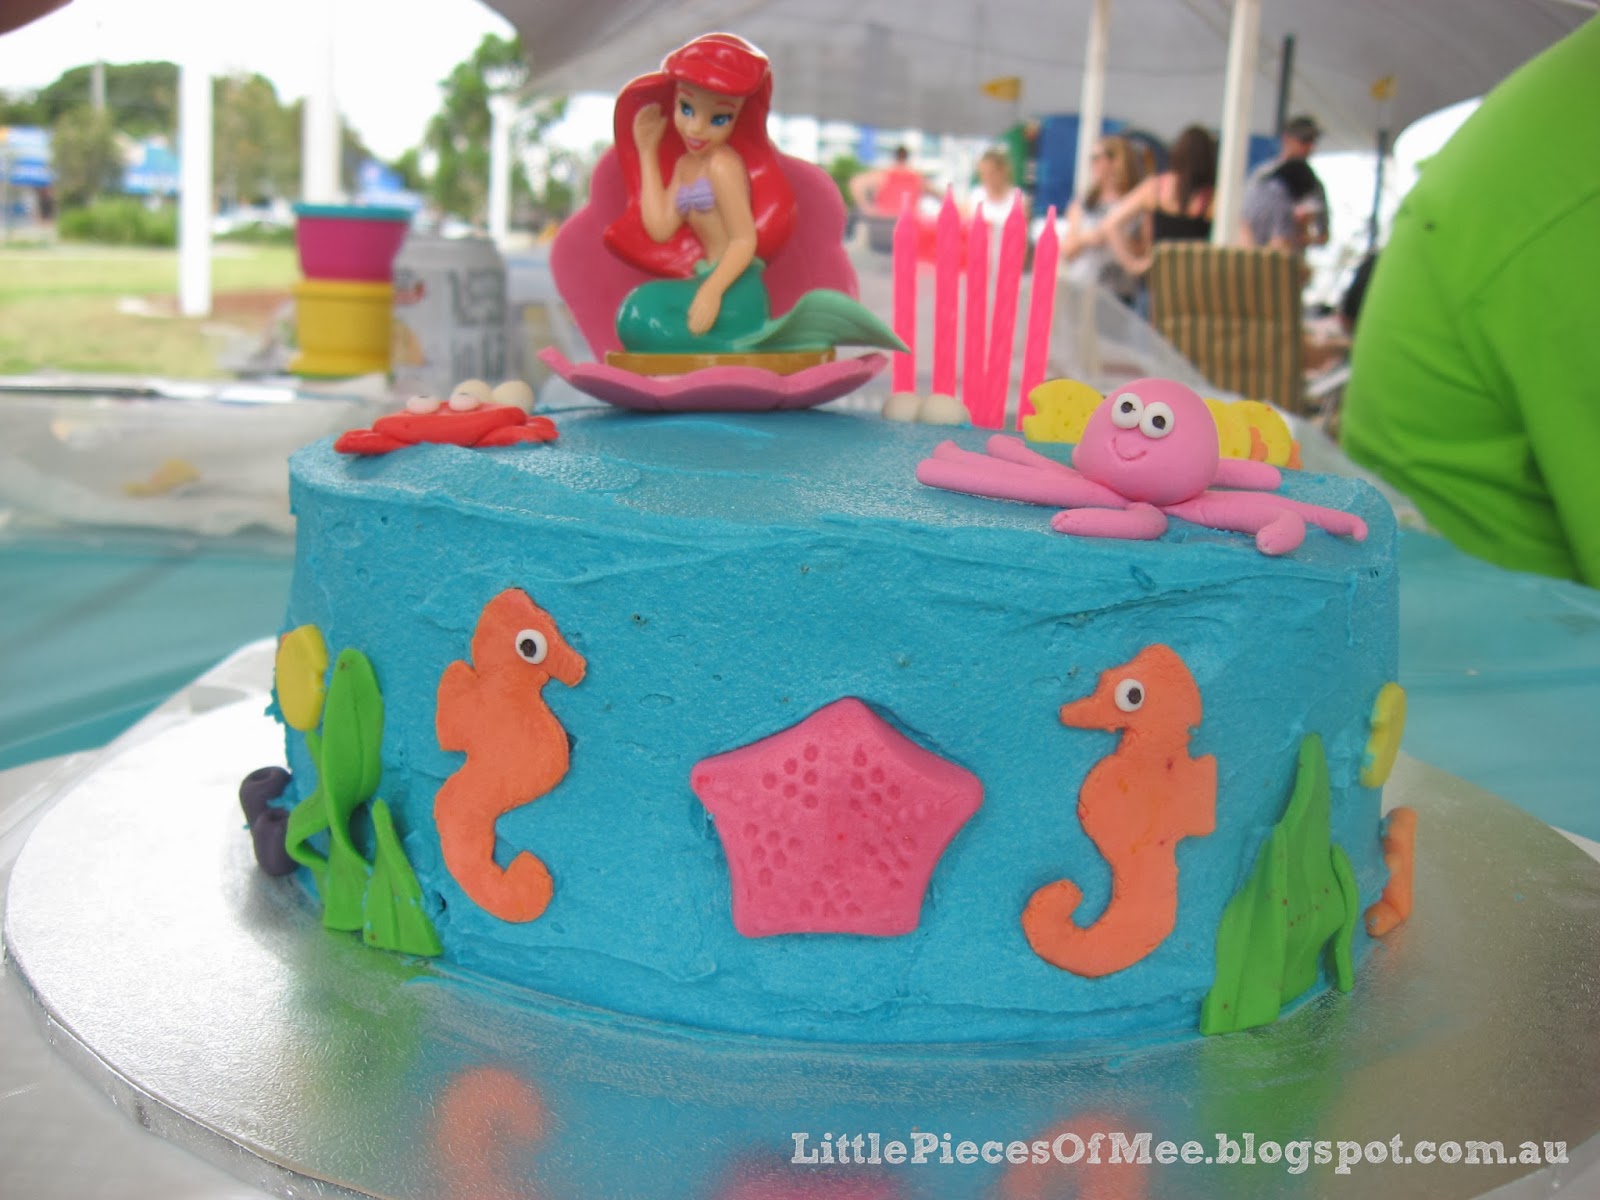
My daughter loves mermaids at the moment (hence the Ariel-themed birthday party a few weeks ago), so she wanted to make a mermaid of her own. These pretty mermaids are made using coloured paper (light pink for the face and blue or green for the tail) wrapped around a toilet roll and decorated with tissue paper and ribbon for the hair and Kindy Glitz to make the tail sparkle. The faces were drawn free hand with a black marker. To make the bottom of the tail, we cut the blue/green paper longer than the toilet roll and then just scrunched the loose section at the bottom in our hands after the paper was stuck onto the toilet roll. The inspiration was from Red Ted Art, but we used paper instead of paint.


Butterfly and caterpillar 

One of the things my older daughter found on a Google search was a pretty butterfly on the TLC website. As her favourite things include butterflies and anything pink, purple and silver, she loved it immediately and wanted to replicate it. We used a disposable plastic plate for the wings and pom poms in various sizes for the body and wing decorations. We also used a pipe cleaner for the antennae, and we stuck a piece of string on the back to hang it with. Everything was stuck together with hot melt glue as craft glue would have taken too long to dry (and probably wouldn't have held the plates together very well).


After we finished the butterfly, my younger daughter wanted to make something of her own, so with some more pom poms from my stash we made this rainbow caterpillar. We used a large pom pom for the face and medium sized pom poms for the body, with two tiny black pom poms for the eyes and a small piece of black pipe cleaner for the antennae. The poms poms are all glued to a paper plate with hot melt glue.


Fairytale castle

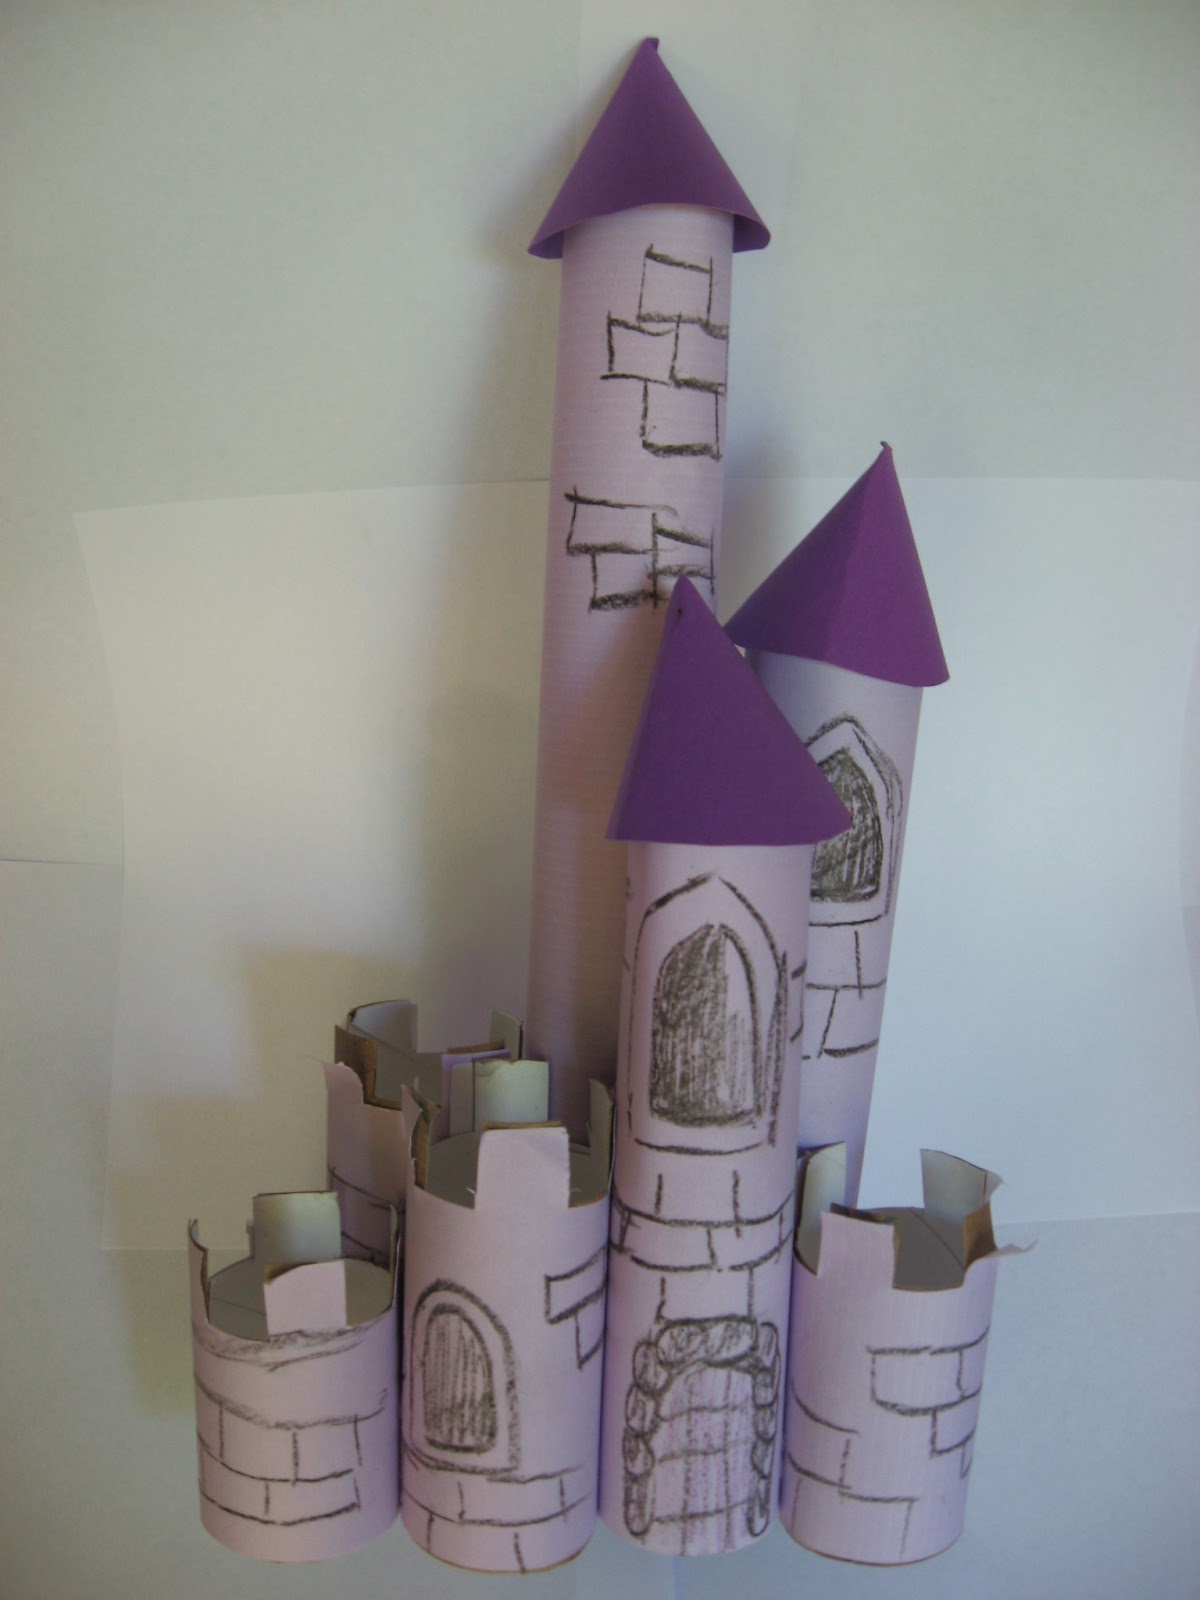
Another of our toilet roll crafts was this mega fairytale castle from Incy Wincy Art Club. Again I've used paper instead of paint for the colour.

I actually couldn't find the right shade of pinky-purple in my paper stash so I printed some out using Word - I just made a rectangle on the screen in Word to fit a whole page and made it the colour I wanted and then printed it out - too easy!

We used some kitchen paper rolls for the taller towers and topped them with some turrets cut out of purple cardstock (just a basic cone shape) and cut down some ordinary toilet rolls for the smaller ones. It was fairly easy to cut the tops of the walls using some scissors, and the my husband drew the brickwork, doors and windows on the towers. We stuck it all together with hot melt glue.


Finger puppets
 
A few weeks ago my daughter brought home a great little dinosaur finger puppet that she had made at school. It was just made from a line drawing that had an extra piece of paper attached to the bottom. I thought that would be a great idea for a craft activity at play group, so I went searching for some different types of pictures that could be used to make finger puppets. I found this template on Kidspot for a fairy but you can also just make them yourself from any picture by leaving a long strip on the bottom (or middle) of the picture to wrap around the finger once its coloured in. Just use some sticky tape to join the ends once its on the finger.


Saturday 13 April 2013

Peanut butter & chocolate biscuits

What do you do with all those little chocolate easter eggs that the Easter Bunny has left behind (other than eating them)? I have a whole heap of them left from Easter a few weeks ago so I was looking around the internet for some sort of yummy baking that I could use some in and I came across a recipe for peanut butter biscuits that had a Hershey's Kiss on top of each one. So I thought I'd give these a go with an easter egg on top instead of the Hershey's Kiss.

These bikkies are lovely and smooth, with a bit of a crunch from the peanuts and, when you eat them warm, a gooey chocolate hit. I'll definitely be adding this recipe to my favourites!

The original recipe is from Kaboose but I have made some adjustments and converted some of the measurements as I find it much easier to measure things like butter by weight rather than in cups.

Peanut butter and chocolate biscuits


Preparation time: 30 minutes
Makes approx 30 biscuits

125g unsalted butter, at room temp
1/3 cup peanut butter
1/2 cup brown sugar
1 egg
1 tsp vanilla extract
1 1/2 cups plain flour
1/2 tsp baking powder
1/4 tsp salt (omit if using salted butter)
15 small solid easter eggs (or other chocolates)

1. Preheat oven to 190C. Line 3 biscuit trays with greaseproof paper. In a large bowl beat butter with an electric mixer on medium until smooth. Add peanut butter and beat until combined. Add brown sugar and beat until combined. Beat in egg and vanilla until combined.

2. Add flour, baking powder and salt (if using). Beat until combined.

3. Using a level tablespoon of dough for each bisciut, form each into a ball. Transfer to trays and flatten slightly. Continue with remaining dough. Make an egg-shaped indent in the centre of each biscuit with your finger.

4. Bake for 13 minutes, or until lightly browned.

5. While the biscuits are baking, cut each easter egg in half lengthwise.

6. Remove the biscuits from the oven and immediately place an easter egg half on each one. The eggs should melt slightly and stick to the top of the biscuit. Cool on trays for a few minutes.

Notes: biscuits can be made up to step 2 and stored in the fridge for a few days or in the freezer for up to 6 months.

Enjoy!

Thursday 4 April 2013

Little Mermaid birthday cake

So once the invitations for my daughter's 5th birthday party were made and delivered, I turned my attention to what I think is one of the most important parts of a birthday party - the cake! Those who know me know that I enjoy decorating cakes, and over the last 5 years I've been able to develop my craft a bit with my kids' birthday cakes. Over the last few years I have made a butterfly, a teddy bear, a lady bug, a fairy garden, a chocolate present, and some number 1 shaped cakes. One day I will post some pics of them.

After some more time searching Google Images and various cake supplies store websites, I decided to do an ocean-scene cake topped with an Ariel figurine inside a clam shell. I couldn't find an Ariel figurine in a clam shell to buy so instead I bought the Ariel figurine and made the clamshell out of fondant (gum paste). I then made some little fish, seaweed, coral, two cute seahorses, a star fish, some pearls and a little octopus. I was inspired by this beautiful cake as well as some similar ones, but made some modifications for my end design.

I also wanted the inside of the cake to be a bit different, and after seeing a tutorial on Facebook by Rosie Cake-Diva, I decided to do a pink heart-shaped centre. You can see a picture of the end result a bit further down this post.
 
Here is a pic of the pink heart cut out before it went into the cake:


And here's a photo of the inside of the cake. The hearts were placed upside down on a layer of cake batter before being covered with the rest of the cake batter:


The night before the birthday party, I prepared myself for a few long hours of getting the cake decorated. In the past it has taken me a long time to get the icing even and smooth on my cakes. I had already baked the cake earlier that day, complete with pink hearts inside, so I made the butter cream icing and set to work. To my complete surprise, I managed to cover the entire cake in icing within about 5 minutes - this is the fastest I've ever done it, and I'm not sure if its because I used a round cake (as opposed to a square cake or odd-shaped cake as I have done in the past) or whether I'm just getting better at it with a bit more practice under my belt. And if I do say so myself, it was pretty neat, with only a few minor blemishes which would soon be covered by the decorations.

With a little bit of help from my husband, who is very arty and has a good eye for balance and placement, I added the fondant decorations and in less than 30 minutes my cake went from nothing to this:


The Ariel figurine and clam shell couldn't go on until we were at the park for the party as they wouldn't have fit under the lid of the cake carrier. You can see a pic of the finished cake a bit further down. For now though, here are some close-ups of the fondant critters I made:


And this is the finished cake just before it was eaten:


And now for the big reveal of the hidden hearts. Until I cut the cake I had no idea how it would look inside, but I was pretty happy with this for my first attempt:


I also made some other food for the party to continue the ocean theme ...
 
Jelly cups with white chocolate shells or starfish


and apricot and white chocolate fish


Plus I also made some choc-coated banana pops:


The end result was a colourful and yummy table of food:


Little Mermaid party invitations

My eldest daughter turned 5 on Easter Sunday and she wanted her birthday party to have a Little Mermaid theme.

Our first task was to create some pretty invitations for her friends and family. We had a look on Google and she loved the picture of a clam-shell shaped invitation that she saw. So I dusted off my trusty Cricut machine and set to work. The outside of the card was relatively easy, being a simple cut on the machine, but the inside was a little bit tricky.

I wanted to print the party details on the bottom part of the shell and a picture of Ariel on the top part of the shell. As my Cricut machine only cuts and doesn't print, I had to print the text and picture first through my normal printer and then try to line up the printed area with the cut area. I worked out that by cutting a template on the Cricut first and then holding the whole page (with the cut out piece removed) over my computer screen with the Word document open and zoomed out to exactly match the paper size, I could line it all up and once it was printed I then put it through the Cricut and it cut perfectly!

After gluing the 4 "shells" together, I decorated the front of the shell with silver Kindy Glitz along the ridge lines of the shell to give it a bit of dimension. My daughter was very happy with the result, especially as pink and silver are two of her favourite colours.

Here is the front of the invitation:
 

And the inside:


And a close up of the glitter on the front:


I will post some pics and details of the birthday cake shortly.